Contents

Saturday, 31 July 2010

Inkido

Volgens mij heb ik jullie nog niet laten zien wat ik gemaakt had voor de DT call van Inkido. Nadat ik door de eerste ronde was gekomen stuurden ze een pakket met spullen op om iets mee te maken.

As I started with my Inkido assignment today, I realised I haven't even shown you yet what I made for their call!!

Ik moest 3 projecten voor ze maken.

I had to create 3 projects: 1: use only the Inkido products we sent you:

1. Iets ALLEEN met Inkido producten. Die layout kan ik nog niet in zijn geheel laten zien want die moet eerst nog op het Inkido blog gepubliceerd worden, maar hier alvast een sneak peak:


2: Create something on the theme "wedding". For this assignment I could use both Inkido and other products. I made this 7Gypsies photo tray:

De 2e opdracht was iets maken met als onderwerp "bruiloft". Hierbij moest je zowel producten van Inkido gebruiken als spullen uit je eigen stash.

Dat is deze 7Gypsies photo tray geworden:


en hier een paar close ups:

En bij de 3e opdracht was je vrij om te maken wat je wilde. Daarvoor heb ik toen deze kaart gemaakt met zowel Inkido spullen als mijn eigen spullen:

And for the 3rd assignment you were free to create whatever you wanted. I then made this card, using both Inkido products and stuff from my own stash:

en een close up:

En toen kreeg ik dus het bericht dat ik in hun design team zit!

And then the announcement came that I made their design team! Last week a whole box of goodies arrived and this morning I decided to start with my first creation for them.... but you won't believe it... I'm actually scared to start! It's all so very beautiful what they sent me and I'm afraid to cut it up!!! How stupid is that! But as I have no choice anyway, I'm closing my computer right NOW and start scrapping!!!

Vorige week arriveerde hun doos met spullen en daar zit ik nu voor .... ik heb net een paar foto's geprint om mee aan de gang te gaan, maar ik vind het zo moeilijk!!!! Het is allemaal zo prachtig wat er in de doos zit dat ik gewoon niet durf te beginnen.... stom he? maar goed, het MOET gewoon, dus ik sluit af en begin!!

Fijn weekend allemaal!
Have a lovely weekend!!

Hugs, Monique

Wednesday, 28 July 2010

Two more layouts for Crop Addict

I love this kit so much I couldn't stop creating!

So here're the next two layouts I made with the Crop Addict August kit:

"FUN IN THE SUN"

(partly inspired by a sketch from Liz Chidester)... and some details:

Don't you just love the expoxy shapes from Epiphany Crafts, <3!!


And here's the next layout:

"WITHOUT A CARE IN THE WORLD"
and some close-ups:

You can find the Crop Addict August kit HERE! and for the extra kit option go HERE!

Thanks for stopping by!
Hugs, Monique 

Wednesday Idea Day

Today I have a tutorial for you I found on YouTube a while ago: "how to crochet a heart".

Here's the LINK!

Have fun!
Monique

Tuesday, 27 July 2010

I {heart} the kit from Crop Addict!

Ik heb toch zo heerlijk zitten scrappen de afgelopen dagen!! (Wat ben ik blij dat ik weer thuis ben!) Eerst de twee layouts voor Epiphany Crafts en toen een fotolijstje met de stempels van myStampBOX (kan ik helaas pas later laten zien) en nu 4 layouts met de kit van Crop Addict!! Super!

The last few days I've scrapped to my heart's content! First the two layouts for Epiphany Crafts, then a photo frame for myStampBOX (sorry, can't show you yet) and now a four layouts with my kit from Crop Addict! I sooo love this kit!!

Here are the first two layouts I made:

Hier zijn alvast de eerste twee layouts, de andere twee volgen van de week :-)

Hier is de eerste / here's the first: "JUST PERFECT":

and a close-up:

Wat ik gebruikt heb: What I used for this layout:

From the kit: cs: Bazzill, pp: Adornit (Destination collection): Travel Seal & Excursion Stripe and Bella Blvd (All Inclusive): Ocean View & Bits a Bella, rubons: Scenic Route, alpha + bits stickers: Bella Blvd (All Inclusive), blurbs stickers: Bella Blvd (All Inclusive), embroidery floss and Ranger ink (own stash).

And the second one "mom can we go to the WATER?"


and some details:


En dit heb ik gebruikt voor deze layout: / And this is what I used for this layout:

From the kit: cs: Bazzill, pp: Adornit (Destination collection): Travel Seal & Excursion Stripe & Journey Defined, (Whoopsy Daisy collection) Shuffle Check Blue and Bella Blvd (All Inclusive): Skipping Stones, alpha + bits stickers: Bella Blvd (All Inclusive).

From the kit option: Ciao Chips alphabet: Bella Blvd (All Inclusive), Ciao Chips Badda Bling: Bella Blvd (All Inclusive).

Thanks for visiting my blog!!
Hugs, Monique

Monday, 26 July 2010

Sneaks from Inkido!

Look at these new lines from Inkido!! I'm so happy to be on their team!

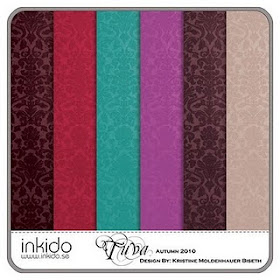
Tuva:
Mathea:
Autumn Wardrobe:
Autumn Friendships:
Don't you think they're gorgeous?!

Have a look at their blog to see what the DT created these last few days! (I have to get started on my projects too!!).

Hugs, Monique

Sunday, 25 July 2010

My challenge on myStampBOX!

For those of you who missed it, here's the challenge I posted on the blog of myStampBOX last week:

I decided on a challenge based on advertisements and photos I found in random magazines lying around my house. I get my inspiration from a lot of things and magazines are definitely high on my list of sources of inspiration!

The inspiration for the first project I created comes from this advertisement I found in a home decor magazine: a black & white collage with a little splash of red:


I created this card using lots of black & white & a little red and stamps from “Colorful Companions” (the butterfly), “En Cette Occasion” (the sentiment) and “Seal It!” (the little heart). The butterfly is heat embossed with some white embossing powder. Love it!!


the embossed butterfly:


Then the second advertisement I used, is this one:

What attracted me to this advertisement are many things: the design, the many details, the colours…., well everything really.

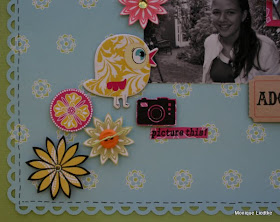
I created this layout of my daughter and tried to capture the same carefree atmosphere of the photo above, using stamps from “Abundant Blossoms” (flowers), “Road Trip” (the suitcase, the stamp, the seal) and “Snapshot” (the photo camera and expression).

and some close-ups:


And then last but not least this advertisement caught my eye:


mainly because I love this green colour and love the combination with white. I used it to create this decoration for the present my son wants to give his teacher to thank her for two wonderful years.

For this last project I used the label stamp from the “Road Trip” set.

This is it!! I hope you liked it and if you decide to give this challenge a try don’t forget to post a link to your blog in the comments section of this post on the blog of myStampBOX!! I would love to see what you create!

Happy scrapping and see you next time!

Thanks for stopping by and hope to see you back soon!
Hugs, Monique

Friday, 23 July 2010

Another layout for Epiphany Crafts

This morning I couldn't resist my scrapping table with my new Epiphany Craft tools! As soon as I saw my desk I had to sit down and scrap!! (addicted???)

Here's the layout I made:


And here are the details:
made this heart with the EC Shape Studio and the clear hearts no. 14

and another closeup:

Made these buttons with the EC Button Stdio using the round buttons no. 14.

I swear I LOVE these tools!!! If you want to learn more about them, just visit their site, HERE!

Thanks for stopping by and hope to see you back soon!!! (btw LOVE comments & followers!!)
Hugs, Monique

Thursday, 22 July 2010

Introducing Epiphany Crafts!!!

Toen ik gisterenavond thuis kwam van vakantie had ik toch zulke gave post!!! Moet je kijken!!!
Last night when I arrived home from my vacation, look what was waiting for me!!!


en in één van die dozen zat dit:
and this was inside one of those boxes:


... de nieuwe tools van Epiphany Crafts!!!!
Natuurlijk heb ik ze vandaag gelijk uit geprobeerd en ze zijn toch GAAF!!!!

the new Epiphany Crafts tools!!!
Of course I tried them straight away today and I'm totally in LOVE with them!!!

Moet je kijken/Have a look:

Step 1:
Place your paper in the viewfinder.


Step 2:
Place the epoxy shape in the tool on top of the paper.


Step 3:
Place the insert into tool.

Step 4:
Close the lid and press.


And this is the result:


En dan is hier de layout die ik gelijk gemaakt heb:
Here's the layout I created today:


met wat details natuurlijk/and then some details:

Used the EC Shape Studio "Heart 25" for this heart.

Used the EC Button Studio "Round 14" for this button.

Used the EC Shape Studio "Heart 14" for this heart.

Vind je het resultaat niet geweldig?? Ik ben er echt helemaal weg van!!!
Don't you just LOVE the result?? I do!!!!

Wednesday Idea Day!!

.... well.... okay Thursday Idea Day today, LOL! As we've been sitting in the car the whole day yesterday, Wednesday turned into Thursday... :-)

I found my idea for today's post in the newsletter from PK Glitz, but you can also find it on their site, here!

It's about embossing brads and because I just bought some embossing powder this idea was just what I was waiting for!!! So I decided to share it on my blog!

Here it is:

Why you don't need embossing ink when embossing metal brads!

If you use embossing ink when powder embossing brads, you will find that the powder will have a tendancy to "flake off" especially after it cools.

A better way is simply to:

1. Heat the Brad


2. Dip it into Powder Keg Embossing Powder


3. Check for any unmelted bits


4. Reheat lightly from behind the brad 


5. Voila, you have a beautiful brad and the color is on to stay. 
This was my tip for the day! Hope you'll like it!! 

Hugs, Monique