Contents

Saturday, 30 September 2017

Pebbles Midnight Haunting Layout

Good morning everyone! Today I’m sharing a Pebbles Halloween layout with you. Are you already getting into the Halloween spirit? Maybe this layout using Pebbles’ spooky Midnight Haunting collection will help you feeling it a bit more! Originally Halloween is not a Dutch festivity, but lately people are celebrating it here more and more. When my son heard that there would be a Halloween celebration in his friend’s neighborhood, I just couldn’t keep him home! I managed to take one quick photo of the two of them and of course I had to scrap it!


For my layout, I decided to make good use of the fabulous die-cuts, stickers and chipboards in this collection. I stitched a large circle on my background page, placed the photo in the bottom right corner and decorated the circle with lots of embellishments.


Instead of using just one photo, I decided to print the same photo twice: one black & white and one in color, the black & white a little larger than the colored one. I then adhered the colored photo on top of the black & white photo and slightly at an angle. I love the extra dimension this gives my page.


My favorite die-cut in this collection is this owl, isn’t he cute?!


Although I also adore these little ghosts! And look how awesome the gold Thickers, puffy sticker and chipboard pieces are! I just love all the different textures in this collection!


How I wish we would celebrate Halloween too, if only because I would then be able to use this Midnight Haunting collection more! I know that if my kids are going to dress up for Halloween this year, I will insist they pose for me so I get to take many more photos!


Thank you so much for stopping by my blog again! Wishing you a crafty day!

xoxo Monique

Supplies:
Midnight Haunting Gold Foil Thickers (733652)
Midnight Haunting Cardstock Stickers Goldfoil (733653)
Midnight Haunting Gold Foil Ephemera (733654)
Midnight Haunting Puffy Stickers (733656)
Midnight Haunting Gold Foil Chipboard Stickers (733659)
Midnight Haunting “Eyes On You” Patterned Paper (733643)
Midnight Haunting “Creepy Crawly” Patterned Paper (733646)
Midnight Haunting “Hocus Pocus” Patterned Paper (733648)

Sunday, 24 September 2017

Pebbles Midnight Haunting Pinwheel Bouquet

Hello friends, for Pebbles' blog I created this fun Pebbles Midnight Haunting project! How I love this new Pebbles’ Halloween collection with it's many Fall-related papers and embellishments! Fall is my favorite season of the year and I always look forward to it.

When I saw this new Midnight Haunting collection, I couldn’t wait to dig in and create something! Here is the first of – I’m sure – many Fall projects to come: a bouquet of “Not So Scary Pinwheels”!


Ever since the kids were small, we have had a little corner in our living room that we like to decorate according to the season. This Fall bouquet of pinwheels is now standing on our Fall-themed cabinet in the living room.

To create this bouquet of pinwheels, I selected all the Autumn papers and embellishments from the Midnight Haunting collection and the Pinwheel Punch Board from We R Memory Keepers.


I hadn’t used this particular We R punch board before and I loved how easy it was to work with! In no time at all, I punched and folded 10 pinwheels!


Look how awesome they look! For the center of the pinwheels, I used brads from my stash.


Because the collection is double-sided and the both the A and B sides are fabulous, the papers are just perfect for a project like this where you see both sides of the page.


I adhered the pinwheels to paper straws by folding the “legs” of the brad around it. I then stuck them in little glass bottles filled with soft sand (in The Netherlands we call this “bird sand”):


The glass bottles were decorated with die-cuts and stickers and a bit of twine:


How I adore this collection!!


This is it! I hope like my little bouquet.

xoxo Monique

Supplies I used:
Midnight Haunting Ephemera (733654)
Midnight Haunting Puffy Stickers (733656)
Midnight Haunting Phrase Thickers Stickers (733659)
Midnight Haunting Double-Sided Cardstock 12″x12″ Whirling Leaves (733640)
Midnight Haunting Double-Sided Cardstock 12″x12″ Pumpkin Patch (733642)
Midnight Haunting Double-Sided Cardstock 12″x12″ Autumn Plaid (733644)
Midnight Haunting Double-Sided Cardstock 12″x12″ Hauntingly Beautiful (733647)
Midnight Haunting Double-Sided Cardstock 12″x12″ Hocus Pocus (733648)
Midnight Haunting Double-Sided Cardstock 12″x12″ Pumpkin Plain (733650)
American Crafts Baker’s Twine Bright (366303)
We R Memory Keepers Pinwheel Punch Board (71345-6)

Thursday, 21 September 2017

Stronger Together - My Creative Scrapbook September Main Kit

Hi everyone! Today I'm sharing a step-by-step tutorial I created for one of the layouts I created with the My Creative Scrapbook September Main Kit. I had so much fun playing with this kit, featuring all the fabulous Pebbles Heart of Home papers and embellishments. For this layout of my hubby and me I used only a minimum of papers and that meant more papers left for other projects! Yay!


Let me show you how to create this page!

1. Gather all your supplies and print a 4" x 6" photo:


2. Cut apart all the little squares from the "Love At Home" sheet and choose your 19 favorites (there are 36 in total!):


3. Place them on your cardstock background paper (without adhering them) to determine where you want each square:


4. Start adhering squares in the four corners of your background cardstock. I adhered them 2 cm from the sides:


5. Adhere squares in between and cut off one centimeter on all sides of your background cardstock:


6. Place your cardstock background on a dark colored patterned paper (I chose the "Family Tree" paper) and add the next row of squares:


7. Choose a piece of patterned paper to place behind your photo (I just adore this "Heart of Home" paper!):


8. Add adhesive to the back of your photo, but only in the middle, so you'll be able to slip die-cuts, tags etc. behind it later-on. Adhere the title at the bottom of your photo:


9. Add die-cuts and stickers to the left and right of your photo:


10. Slip in two tags at the top of your photo and add machine stitching randomly to your squares and you're done!!!


Don't you just love the result?! and it's so easy to create this page! Here are a few close-ups:


Hope you like it too. Can't wait to see what you'll create with this kit. Don't forget to share your projects on our "inspiration central" facebook page

Thank you so much for stopping by my blog today and if you want to see more pages created with this fabulous kit then hop over to the Design Team Gallery

xoxo Monique

Wednesday, 6 September 2017

My Creative Scrapbook September Kits Reveal

Hey everyone! Today I'm sharing the first layout I created with the September Main Kit from My Creative Scrapbook. Today it's Reveal Day and on the blog of My Creative Scrapbook you'll find all four September kits revealed!! The Main Kit features the Heart of Home collection from Pebbles Inc. and although I'm already on Pebbles design team and have been creating with this collection before I still adore this kit! Today I'm posting the first layout I created, I'll post the other 3 over the course of the rest of the month.


A few close-ups of some details: don't you just love these die-cuts?!


Here's a photo of the MCS September Main Kit and you know what?! September is FREE GIFT month for My Creative Scrapbook members. Each box that ships will have a FREE gift to thank the member for their support of the kit club. For the September Main Kit the free gift is the beautiful 6x6 flower stencil you see in the photo!


For more inspiration & information please visit the My Creative Scrapbook website! On the MCS blog you'll find photos of all four September kits and in the MCS gallery you'll find all the projects the design team created with all the kits!

Thank you so much for taking a look at my blog post!
xxx
Monique

Friday, 1 September 2017

Stuck?! Sketches September 1st Reveal

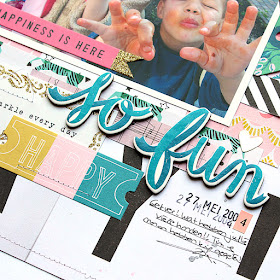
Hi everyone! It's time for a brand new sketch from Stuck?! Sketches and it's a great one once again!! As I had just received my Crate Paper order from Paper Issues I knew just what to use! Here's what I did:


I used a very old photo of my two eldest kids who are showing me their very dirty hands! 

Here are a few close-ups of a couple of the awesome embellishments in this Maggie Holmes "Carousel" collection:


And here's the sketch Laura created for us: 


As always, we have three fabulous sponsors at Stuck?! Sketches!

Altenew, who are offering a beautiful Reflections Scrapbook Kit to one lucky participant!

and:

Lea Rhea of "Scrap and Plan with Lea", who is sponsoring this challenge, offering a spot in her "6 sketches 6 ways class" to a second lucky participant!


AND Accent Scrapbooking, who are also sponsoring this challenge, offering a $25.00 gift certificate to their online shop to our third winner!


If you decide to join in the fun then please link up your layouts over in the sidebar on Stuck?! Sketches' blog by September 29th at midnight EST to be in the running for one of our prizes! All prizes will be drawn randomly using Random.org to pick a number.

This is it! Thanks again for stopping by and hope to see you back soon! Enjoy the rest of your Friday!
Hugs,
Monique