Contents

Wednesday 25 October 2017

Bella Blvd and Pandas ... a perfect combination!!

Today I thought I'd share this layout Bella Blvd layout I created a little while ago. I wanted to scrap the photo of my youngest and my daughter and still had the  "Popsicles & Pandas" collection lying on my desk so the choice was easy: 


And a few close-ups: I just love all the stickers in this collection and used quite a lot!


And just look at that cute little ladybug!!


I think that the paper clips in this collection are my favorite!


The "Get Around" cut file I used is from The Cut Shoppe. 

Thank you so much for stopping by!! Have a wonderful evening and hope to see you back soon!

xxx
Monique

Wednesday 18 October 2017

Boss's Day Layout

Hi everyone! For Pebbles I created this layout about my work using the Woodland Forest collection. Did you know it was “Boss's Day” on October 16? I didn’t, so I had to learn more about it! When I looked it up, I found out that it’s a day “to thank our bosses for being kind and fair throughout the year”. When I read this, I decided it was high time I created a page about my boss and my work. I’ve been working for him & the company with great pleasure for eight years already! As this week we (at Pebbles) are also focusing on journaling, this really was the most perfect opportunity to write about my work and add it to my page.

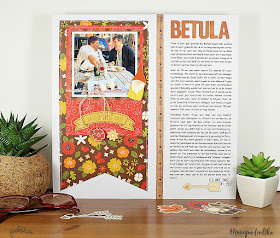
As it happens, I had just snapped this picture of my boss and a colleague when we had dinner together the other day.  It was an obvious choice to use for my layout (yes, it looks like we have lots of fun in the office, but we also work hard, lol!). Here’s what I created:


I loved creating a page about my work and can’t believe I haven’t done this sooner! As I find journaling the hardest part of my layouts, I decided to start with that. I wrote my story on my laptop in Word. I then printed it on a piece of white cardstock and cut it to the right size, leaving enough room at the top for some Thickers to create a title:


The cardstock with the journaling was adhered on the right side of my layout.  To hide the “seam,” I glued a strip of paper over it. Next, I matted the photo and placed it on two pieces of patterned paper. Before adhering everything together, I wound a piece of twine around the photo for added texture. To add more depth to my page, I adhered the sticker of the gnome and the banner die-cut to the page—both with some AC Sticky Thumb foam adhesive.


Except for the gnome sticker and the banner die-cut, I also added these two rubber shapes. Aren’t they just perfect?!


Even though this layout doesn’t conform to my usual style, which uses many more embellishments, I really like the result. Hope you do too!


Thank you so much for stopping by my blog! Wishing you a wonderful day!

xoxo Monique

Supplies:
Woodland Forest Rubber Shapes (733438)
Woodland Forest Stitched Floral (733429)
Woodland Forest Fall Florals (733434)
Woodland Forest Woodland Critters (733435)
Woodland Forest Cardstock Stickers (733436)
Woodland Forest Ephemera Die-Cuts (733437)
Woodland Forest Wood Veneer Shapes (733439)
Woodland Forest Thickers Friends (733440)
Woodland Forest Cardstock Phrase Stickers (733442)
American Crafts Sticky Thumb Adhesive Runner and Refill (340261)
American Crafts Sticky Thumb Adhesive Foam White Dots (340272)

Tuesday 17 October 2017

My Creative Scrapbook October Step-By-Step Tutorial

Hi friends! Today I'm sharing another step-by-step tutorial for one of the pages I created with the fabulous October Main Kit from My Creative Scrapbook.

I created a layout about my daughter and her love for books. As I totally adore the large die-cut letters from Jillibean Soup in this kit I just had to feature those! Here's the page I did:


And here's a quick step-by-step how I created this layout:

1. Gather everything you think you're going to need including a square photo (sized 10 cm x 10 cm or 4" x 4" including the white border):


2. Decide on a title for your page and place the letters in a circle on your background paper leaving one corner free for the photo. Use just a little bit of adhesive, so you can alter the position of the letters later-on if needed:  


3. In the October Main Kit you'll find many fun word stickers. Choose the smaller ones or cut larger word stickers in half and adhere these in a circle right beneath the letters you just adhered: 


4. Mat your photo and place it in the corner you left open. Embellish the right bottom corner of the photo a little: 


5. Type and print your journaling using lots of different fonts. My journaling consists of titles of my daughter's favorite books only.


6. Using the letter stickers from the Jillibean Soup cardstock stickers sheet add a few words before gluing printed journaling strips in place: 


7. (Hand) cut your journaling into small strips and fill the circle with these. Add one or two die-cuts as well: 


8. Sew the large die-cut letters in place either using your sewing machine or by hand. Add a few drops of yellow color mist and a date stamp and maybe a few extra embellishments and you're done!


Here are a few more close-ups: 


My daughter is very happy with how this turned out and asked if she could have the layout framed to hang in her room! Hope you like it too! 

I really really love this month's kit, Jillibean Soup is one of my very favorite manufacturers and I'm so happy Pam included the entire Farmhouse Stew collection in this kit, including all the papers twice (!), the cardstock & puffy stickers and all the die-cuts, including the large letters! 


Can't wait to see what you'll create with this kit. Don't forget to share your projects on our "inspiration central" facebook page

Thank you so much for stopping by our blog today and if you want to see more tutorials then please visit the MCS blog and for more pages created with this fabulous kit then hop over to the Design Team Gallery

Wishing you happy scrapping! 

xx Monique

Sunday 15 October 2017

Adventure awaits - Bella Blvd

Today I'm having some time to myself so I decided to pull out some of my favorite scrapbook papers to play with. A little while ago I bought Bella Blvd's "Popsicles & Pandas" because my youngest favorite animal is a panda. As I hadn't had the chance to use this collection just yet I chose to scrap with it today! Here's one of the layouts I created: 


When starting to scrap with a brand new collection I always have difficulty cutting into the beautiful brand new papers and this time was no exception. So for the first page I (once again) used the cover sheet of the collection pack. Of course I had to use other papers as well, but now it somehow seemed easier to cut into those. 

Here are a few close-ups of some details. I totally adore the puffy stickers and the paperclips in this collection!! 


Thank you so much for stopping by. Hope you had some time to scrap as well!
xx
Monique

Sunday 8 October 2017

Doodlebug Card for World Card Making Day

Yesterday it was World Card Making Day and so I just had to create at least one card! I had this fabulous "At The Zoo" collection from Doodlebug lying on my desk and decided to use it for this happy & fun birthday card:


One can never have enough birthday cards and this collection is just perfect to create birthday cards with! (Well, to be honest, I find Doodlebug perfect to use for everything, lol!)


How I adore the little animals in this print! 


And did you join in the fun on WCM Day? Thanks anyway for stopping by to see what I did. 

xx Monique


Thursday 5 October 2017

My Creative Scrapbook October Kits Reveal!

Hey everyone! It's the start of a new month and that means that the four (!) new My Creative Scrapbook kits for October are up!! Today I'm sharing the first layout I created with the October Main Kit from My Creative Scrapbook. The Main Kit features the Farmhouse Stew collection from Jillibean Soup and I soooo love this kit! Here's the first layout I created, I'll post the other layouts over the course of the month.


And a few close-ups:


Here's a photo of the MCS October Main Kit, awesome right?! 


For more inspiration & information please visit the My Creative Scrapbook website! On the MCS blog you'll find photos of all four October kits and in the MCS gallery you'll find all the projects the design team created with all the kits!

Thank you so much for taking a peek at my page!
xxx
Monique

Tuesday 3 October 2017

Pebbles October Sketch Challenge!!

Hey friends! Are you enjoying your week sofar?! I really hope so! I'm terribly busy these days ... as of May I'm working five days a week, doing two office jobs for different companies but luckily in the same office building. I have two desks next to each other and every hour or so I switch desks, lol. But you understand that as of May my time to scrap is a lot less than it was before ... having said that, I assure you that won't ever stop scrapping! It's my lifeline! It's how I keep sane! 

Now on to this fun challenge Pebbles started this month: a sketch challenge using one of the fabulous sketches of Laura Whitaker! There are two prizes so it's definitely worth your while to join in!! 

I used Pebbles' Happy Hooray collection, which I totally adore with the fun animals and awesome colors. Here's a page celebrating my oldest son's 17th birthday last year. 


and a few close-ups of some of the fun details like the puffy stickers and acetate die-cuts:


Or how about the chipboards in this collection? I love the words and the alpha's!!


Here's Laura's sketch we used: 


And here are the challenge rules:
  • Submissions need to be made mostly of Pebbles products.
  • Submission photos need to be clear and bright so that everyone knows what they are voting on.
  • All submissions need to be sent to meganl@americancrafts.com by October 13th.
  • There will be 2 winners: one will be chosen by the design team and the other will be chosen by you and your peers. In order to hold a vote, all submissions will be posted to Facebook.
  • Voting will take place October 16 to 23rd at noon; the winners will be announced that afternoon on Facebook.
Really hoping you'll join in!! 

Thanks for stopping by and good luck!
xx
Monique