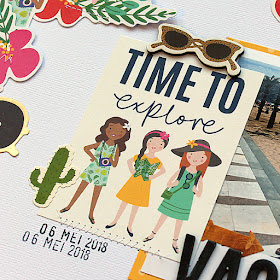
For today I chose to do a step-by-step of my "Vacay" layout created with the March Main Kit and Pebbles' Chasing Adventures collection. I'm a huge fan of Pebbles and totally adore this collection. When I had finished three layouts with this kit I had a large amount of ephemera left over and because I really love each and every one of the cute die-cuts I decided to do a layout where I would use all of the leftover die-cuts I had!
This is the page I made:
As I really loved the result I thought I would show you how I created this.
First of all I gathered all of the supplies of the March Main Kit I had left (which was quite a lot, considering I had already created 3 layouts with it):
Next I drew a large circle on a sheet of white American Crafts cardstock using a chipboard circle template from Technique Tuesday (from my stash):
Now I had to decide where I wanted which die-cuts on my layout. I started with the flower die-cuts and divided them evenly on the circle I had drawn:
The next step was to fill in all the white spaces on the circle. I started at the bottom:
And in this way I worked my way around the circle. The next part I filled in was the bottom right corner:
I continued my way around the circle, at first only using the die-cuts, but as I neared completion of the circle I also added in some of the fun stickers:
Doesn't it look fun? Those die-cuts in this collection are my new favorites!!
Now I only had to add my photo to the layout. I chose a photo of my daughter where she has this similar pose to some of the die-cuts of the die-cut girls. I matted the photo on to a piece of yellow patterned paper (from the sheet called Savanna) and placed it on the right middle side of my page:
With a journaling card from the sheet called "Adventure", one of the Thickers phrases and an extra chipboard piece and sticker my layout looked almost finished:
With the addition of some machine stitching, hand journaling and a stamped date (twice) the layout was complete!
The layout was done in no time at all and it felt so good to use all of those die-cuts. Normally when I really really love scrapbook supplies I save them for a very special occasion which often means they stay in my stash gathering dust. Using them felt so much better!
Here's a look at the March Main Kit I used:
If you want to see all 4 March kits hop over to the MCS website and for photos of projects created by the design team with the various kit, please visit the Design Team Gallery.
Thank you so very much for stopping by! Happy crafting!
xoxo


This is genius! I loveeeeeee how you added to the circle!! I am so pinning this!!! Such a great idea!!!!!!!!
ReplyDeleteHello Monique!
ReplyDeleteI'm writing an article about the alphabet punch board for the french magazine Passion Scrapbooking.
Would you allow me to show your creation made with it ?
(seen here : http://pebblesincblog.com/tag/mini-alphabet-punch-board)
Of course, your name would be printed just next to the photo and the link to your blog in the address book...
Please, answer as soon as possible (even it is "no") because I have to give my paper for this evening. ;-p
Best regards,
Elise AMANN
Please, answer directly to my email address elise.amann(at)wanadoo.fr