Showing posts with label Paige Evans. Show all posts

Saturday, 23 January 2021

Eat Sleep Scrap Repeat | Pretty Little Studio

Hello friends! I'm so happy it's my turn on the Pretty Little Studio blog today! I'm sharing this layout created with the beautiful Miss Sadie Rose collection for my layout and a digital cut file from Paige Evans. Here's what I made:


For the background I used a sheet of watercolor paper. I painted it in a light pink color using my Gelatos and some water. When it had dried I added pink Nuvo mousse using a 6" x 6" stencil with lots of "broken" hearts. 

Next I backed the cut file with 5 different patterned papers, using a different paper for each word. To create a bit of depth I used foam tape to adhere the cut file on the background paper. 


Around the photo I created a cluster with some die-cuts and word stickers and beneath the photo I added a lenght of sewing machine thread. 


I really love the little pink word stickers in this collection and used them on several places on my page:


The little purse is a super cute sticker as well: 


This is it! Thank you so much for stopping by my blog and please don't forget to check out this beautiful collection in the Pretty Little Studio store

Here's a list of PLS products I used: 

Sunday, 29 March 2020

Hello Spring | Step-By-Step for My Creative Scrapbook

Hello friends! Today I'm sharing a step-by-step for one of the layouts I created with the awesome March Main Kit from My Creative Scrapbook.

I was thrilled when I saw the contents of this month's kit! Lots of Pink Paislee's/Paige Evans 'Bloom Street' collection and also some products from Shimelle's 'Never Grow Up' collection. I love all collections designed by Paige Evans and this collection was on top of my wish list! Here's the layout for which I wrote the little step-by-step:


I got started by displaying the entire kit on my desk and the photo I wanted to use: 


Paper 10 stood out immediately and so my decision to go with that paper was made very quickly. I got out my craft knife and cut several diamond shapes from this paper:


At least one diamond shape had to be large enough to be placed behind my photo:


 I organised all the shapes on a white cardstock paper to determine a design for my layout:


Before adhering all these diamond shapes I got out my pink stamping ink and Nuvo blender brush and colored the background paper in a subtle pink shade:


Next I adhered all the shapes: 


and glued a long pink machine thread on top:


The matted photo, a journaling card and a flower die-cut & word die-cut came next:


The journaling card needed a bit of machine stitching:


Now I just added a few more stickers and die-cuts, like this sun die-cut:


These two beautifully colored word stickers:


Another word die-cut with beautiful foiled accents:


And I added some extra flowers as one can never have enough flowers! 


With a few paint drops and a written date my layout was done! Hope you like it!

Here's a photo of the March Main Kit: 


Awesome, right?

For more information about this kit (and the other 3 kits of this month) please visit the My Creative Scrapbook website and if you want to see the photos of all projects created by the design team with the various kits, please visit the Design Team Gallery.

Thank you so much for stopping by today! Wishing you happy crafting!
xxx 

You can find more of my work here: Instagram / Blog / Pinterest

Tuesday, 10 March 2020

You Make Me So Happy | My Creative Scrapbook March Main Kit

Sharing another layout created with the March Main Kit from My Creative Scrapbook, the Bloom Street collection from Pink Paislee/Paige Evans. Love this collection so much! I scrapped yet another photo of my English Cocker Spaniel puppy.


Here are a few close-ups:


I just adore all the colors in this collection!!

Here's a quick peek at the March Main Kit from My Creative Scrapbook:


For more information about the kit please hop over to the website of My Creative Scrapbook.

Wishing you a wonderful week!
xoxo

Sunday, 8 March 2020

You Are My Sunshine | My Creative Scrapbook March Main Kit

Hello everyone! Are you enjoying your Sunday as much as I am? I love my days off, so I can have coffee at a friend in the morning, take long strolls with my puppy, catch up on my reading and scrap a bit of course! 

Today I thought I'd share one of the layouts I created with the fabulous March Main Kit from My Creative Scrapbook. This kit is filled with the Bloom Street collection from Pink Paislee/Paige Evans (papers, stickers and die-cuts), but also has an extra packet of flowers from Shimelle. 


For this layout I mostly used paper 24. My favorite paper in this collection!! 
And a few close-ups:


And a photo of the March Main Kit:


For more information about the March kits please visit the My Creative Scrapbook website and if you want to see the photos of all projects created by the design team with the various kits, please visit the Design Team Gallery.

Thank you so much for stopping by and taking the time to look at my page!
Wishing you a wonderful week!
xoxo

Friday, 1 November 2019

Feels Like Fall | Pink Paislee/Paige Evans

Here's a Fall layout I created for JustNick Studio using the beautiful new "Leaf Circle Background" cut file and the Truly Grateful collection from Pink Paislee/Paige Evans, combined with a few sheets from her Horizon collection. This cut file is so perfect for a Fall layout, when I saw it, I just had to use it! Here's what I made:


And this is the "Leaf Circle Background" cut file I used:


I cut the leaf circle from the multicolored sheet (Horizon, paper 3) and love the result, with all the leaves in different colors! Just like Fall, right?!


Except for the "Leaf Circle Background" cut file I used two other cut files: the "Feels Like Fall" cut file:


and the "Fall Leaves" cut file:


Fall is my favorite season and every year I'm so happy when it finally arrives. It goes without saying that I love all the Fall cut files and all the Fall scrapbook collections! Here are a few close-ups of my page:


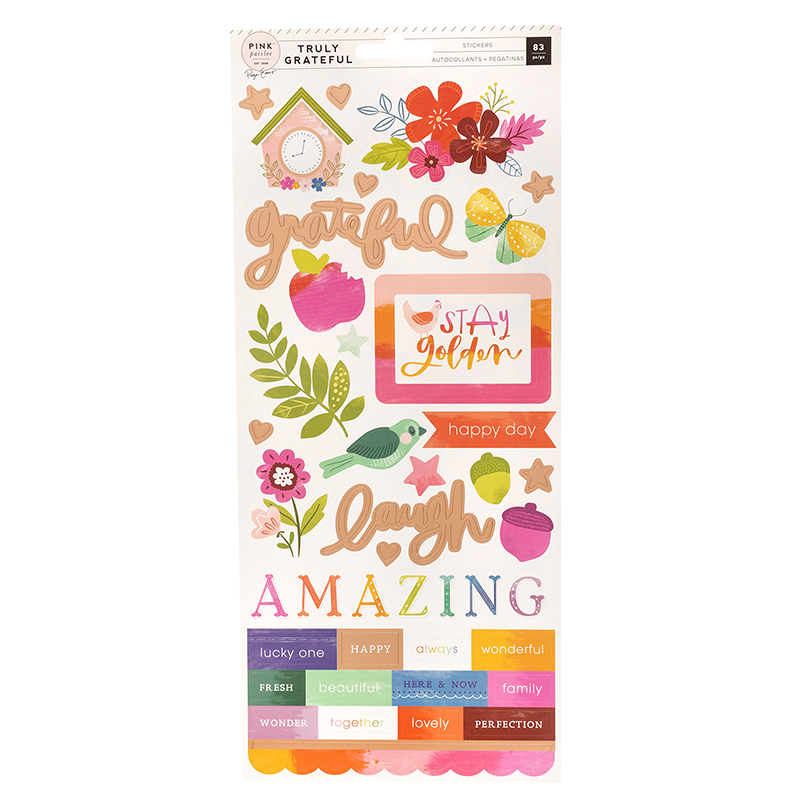
To every cluster of leaves in the circle I added a few more embellishments and also some extra leaves. Some of the leaves I cut with my Silhouette and some of them are from the ephemera package from the Truly Grateful collection. I love all the die-cuts, cardstock stickers and puffy Thickers belonging to the Paige Evans collections and used many of them on my page!


I machine stitched a few of the leaves but not all of them as I really like it when they curl up a little. It gives a bit more depth to the page


I used two photos of my daughter, reading her book in the park. She's a huge fan of reading and always has one or two books with her, wherever she goes.

I hope I inspired you to scrap your Fall photos! So if you're looking for some fun Fall cut files as well you can find them in the JustNick store!

Thank you so much for stopping by today! Wishing you a wonderful day with lots of crafting!

xoxo

Monday, 28 October 2019

LOVED | Pink Paislee | My Creative Scrapbook

Today I'm sharing another layout created with the October Main Kit from My Creative Scrapbook. I wanted to do a boys layout with this kit and found a recent photo of "my" three men: my husband and two sons. that I wanted to scrap. This is what I made:


I really like the result even though I used some paper with a flower design! The colors of the papers match exactly the colors in my photo. I so love it when that happens, lol. 


Those puffy stickers are my favorite kind of stickers! 

Thank you so much for stopping by! If you want to see the kit I used, filled with the Truly Grateful collection from Paige Evans/Pink Paislee, hop over to the website of My Creative Scrapbook

Happy crafting!
xoxo

Saturday, 19 October 2019

ADORE | My Creative Scrapbook

Happy Saturday everyone! Today I'm sharing a step-by-step for one of the layouts I created with the October Main Kit from the kit club "My Creative Scrapbook". I think this kit is my favorite to date! It's filled with the awesome "Truly Grateful" collection from Paige Evans/Pink Paislee. I love how colorful this kit is!

A few weeks ago we had this furry sweetie joining our family and of course I only want to scrap her photos now. Here's what I made:


And here's how I created this page. I gathered all my supplies:


I used some templates from my stash (Technique Tuesday) to draw 6 different sized hearts and hand cut them:


I adhered the largest heart on my layout and machine stitched two times around it: 


Next I glued the other hearts on top with just the minimum of adhesive, machine stitched right through the middle and folded the sides a little upwards:


I love that all the papers in this collection have two awesome sides! Before I stitched the hearts in place I had a hard time choosing which side should go up! 
Next I decorated the inside of the top heart with words from the Truly Grateful cardstock sticker sheet:


After decorating the heart a bit more with some of the Truly Grateful puffy stickers I started on the photo of my puppy. I printed a square 10 cm x 10 cm photo of her and matted it on a piece of patterned paper. Both at the bottom and at the top of the photo I added a die-cut with a few puffy stickers:


In the right bottom corner of my layout I added a few more cardstock and puffy stickers and the date stamp:


On the right side of the hearts I added a few more die-cuts and puffy stickers and around the entire layout I drew a black line.  


A few drops of ink and my page is done!  

Thank you so much for visiting my blog! I hope you have enjoyed my step-by-step.

For more information about this kit (and the other 3 kits of this month) please visit the My Creative Scrapbook website and if you want to see the photos of all projects created by the design team with the various kits, please visit the Design Team Gallery.

Here's the photo of the October Main Kit I used:


Thanks again for stopping by! Wishing you happy crafting!
xoxo