Tuesday, 17 February 2015

Two Pebbles Layouts - Scraptastic Store

Hello scrappy friends! For today's post I've got two Pebbles layouts to share. For both pages I used the super cute "We Go Together" collection and the beautiful gold foil foam Dear Lizzy Thickers (these are definitely my new favorite Thickers!!!).

Here's my first layout with a photo of my daughter and her boyfriend.


For the background I started with the XOXO paper, cut it diagonally and turned one half upside down and stitched both halves to a sheet of white cardstock. Next I cut a smaller square from the Sending Love paper and did the same. The strip at the bottom of my layout is actually one of the strips of paper that you’ll find at the bottom of every sheet of paper in this collection. The ruler is from the We Go Together paper.

These are those fabulous gold foil foam Thickers:


The journaling is written on the library card in the pocket:


And I'm a huge fan of those jar die-cuts and stamps etc., so I was very happy to find a vellum jar die-cut in the "Chips" bag.


And now my second page "Best Ever": this layout is all about things I love: latte, cute tableware, owls, antiques, type writers ... and you find it all in this one photo!


This layout came about so quickly! I used some of the left-overs from the first page, another library pocket (on which I've written all the things I love) and a few die-cuts and stickers. I doodled a bit with a black pen and I was ready.


Love those epoxy hearts from Pebbles!! and here another close-up of the beautiful Thickers:


Here’s the list of supplies I used, everything is from the Scraptastic Store.

Patterned paper, chips, epoxy hearts, library tags: Pebbles We Go Together; Thickers Dear Lizzy; Love Paper Clips: Freckled Fawn.

Thank you so much for stopping by our blog today! Hope you’ve enjoyed my pages.
xoxo


Sunday, 15 February 2015

Webster's Pages Winter Layout - CREATE Magazine

Hi Scrappy Friends, today I want to share one of my projects created for January CREATE Magazine. Remember the magazine can be downloaded for free HERE and you can download the sketches HERE.

This layout was made for the "Theme" challenge, which was "Winter":
When my daughter asked if she could go on a skiing vacation with her school, I said okay, but make sure you bring me a photo! And that’s what she did! Love how the colors of the photo match these papers from Webster’s Pages! And how I adore the starburst paper!


and a few close-ups: the cut file is from Kerri Bradford Studio, love those!


The journaling is hidden on the tag.


Supply List: Patterned paper, mini craft bag, twine and chipboard buttons: Webster’s Pages; Cardstock: American Crafts; Transparency: Webster’s Pages; Transparent die-cut word: Studio Calico; Die-cuts: Teresa Collins; Cork Heart: Elle’s Studio; Wood Veneer: Studio Calico; Puffy sticker: Paperchase; Flair: A Flair For Buttons; Paperclip: Freckled Fawn; Tag and ribbon: misc.; Stamping Ink: Ranger; Stamp: Trodat; Silhouette Cut File: Kerri Bradford Studio; Other: Pen: Sharpie; Tiny Staples: Tim Holtz.

Hope you like it!

Don't forget to check out the fabulous January magazine if you haven't already!
Have a fab Sunday!
xoxo

Saturday, 14 February 2015

Valentine Box Card - Imaginisce

Hi everyone! For Imaginisce I created a Valentine Box Card using my Silhouette Cameo. I've seen these box cards a lot, but never made one myself. So when Cari asked us to create a "love" project I knew straight away what I wanted to do!

I started with Imaginisce's "Little Princess" collection (because of all the pinks) and chose one of the cute box cut files from the Silhouette online store and got started. Here's what I cut: 


For the base I used American Craft's smooth white cardstock (which cuts perfectly in the Silhouette!). 

Here's the result:


And you know what is so fun about these cards? They easily fit into an envelop if you do this: 


When I was finished putting everything together I noticed some white edges around some of the shapes and because I didn't want these, I used Imaginisce's D-Stress tool to polish these off: 


Because of the fine tip you can easily reach into every corner: 


And then - last but not least - I wanted to attach a little piece of ribbon to the top of the card and of course I used Imaginisce's I-Magicut Ribbon Cutter to give my ribbon smooth edges. 

This tool is super easy to use!! 1: Lay a piece of ribbon between the blades of the tool, make sure the switch is in the "on" position and gently press the button for a few seconds:  


2: After 2 or 3 seconds release the button and open the tool:


Because of the hot wire inside the tool the ribbon is cut through and the edges are sealed! No more frayed ribbon edges!


Awesome right?! You can see the Imaginisce YouTube video on how to use this tool HERE

Supplies:
Imaginisce - Litte Princess (patterned papers, jewels), D-Stress Tool, I-Magicut Ribbon Cutter & Sealer, Pogo Adhesive Suspenser
American Crafts - Thickers, Cardstock
Other: paperclip, ribbon, word label, Silhouette Cameo, Silhouette cut file #73227

Thank you so much for stopping by my blog!
Have a nice weekend!
Xoxo

Thursday, 12 February 2015

Bold-Line Embellishment Christmas Layouts - Scrapbook Magazine UK issue 86

For the December issue of Scrapbook Magazine UK  (number 86) I was asked to create three layouts with a bold line of embellishments. 

And here's what I made!

"Merry Everything": for my “Merry Everything“ layout I covered an entire strip of patterned paper with embellishments. I started with some cardstock shapes and layered chipboard and die-cut elements, buttons, stickers etc. on top. I ended with small elements like stickers to fill the “holes”. 


and some close-ups: 


Supply list: patterned paper, die-cuts, stickers: October Afternoon; cardstock: Bazzill Basics; chipboard, button, acetate snowflakes, wood veneer : Studio Calico; paper clip: Webster’s Pages; spray mist: Prima Marketing; pen: Stabilo; photo overlay: Ali Edwards; cut files: Totally Jamie; adhesive: tape runner American Crafts, 3D Foam Squares Scrapbook Adhesives. Tools: Silhouette Cameo, Aigger sewing machine.

"Naughty": for my “Naughty” layout I created a bold-line with embellishments horizontally in the middle of my page, except on top of the photo. To give the impression the line continued across the photo I added some wood veneer to it. 


And some close-ups: 


Supply list: patterned paper: Teresa Collins, Crate Paper; cardstock: Bazzill Basics; overlay: Webster’s Pages; die-cuts: Crate Paper, Studio Calico; Chipboard: Crate Paper; wood veneers: Studio Calico; sticker: Pretty Little Studio; cut files: Silhouette store; adhesive: tape runner American Crafts, 3D Foam Squares Scrapbook Adhesives. Tools: Silhouette Cameo, Aigger sewing machine. 

And last but not least this Bella Blvd layout: "Celebrate"
For my last layout “Celebrate” I started with the shape of the Christmas tree and covered one side with fun embellishments. 


Close-ups:


Supply list: ”: patterned paper, chipboard shapes, die-cuts, stickers: Bella Blvd; cardstock: American Crafts; pen: K&Company; sequins: Doodlebug Design; spray ink: Prima Marketing; cut file: Kerri Bradford; adhesive: tape runner American Crafts, 3D Foam Squares Scrapbook Adhesives. Tools: Silhouette Cameo, Aigger sewing machine, V&D long reach stapler. 

These are only three examples of "bold-line embellishment" layouts; the possibilities are endless!


Thank you so much for stopping by! 
xoxo

Wednesday, 11 February 2015

Documented - 8.5x11" layout - Pretty Little Studio

Hi everyone! Thank you so much for stopping by again today! 

I want to share another 8.5”x 11” layout which was up on Pretty Little Studio's blog last Sunday, created with every Pretty Little Studio “Marigold” scrap of paper I had. I love this collection so much that I hate to waste even the smallest piece of paper! So I filled a whole sheet of white cardstock with different strips of “Marigold” papers. 


Adhered some of these fabulous die-cuts! (never ever tire of these!)


And added a few words:


I machine stitched everything, found a photo and adhered it (yes, I created the page before I even had a photo, lol) and added a few bits and pieces. And was done in no time! 

Hope you like it! Happy scrapping!
xoxo

Monday, 9 February 2015

A 17turtles card and a layout sneak!

Hi everyone! So happy to announce my very first project is up on the 17turtles blog!! Apart from this sneak peek I can't show it to you here, but if you click on this LINK it brings you to the 17turtles blog and you can see it in all it's glory, lol!


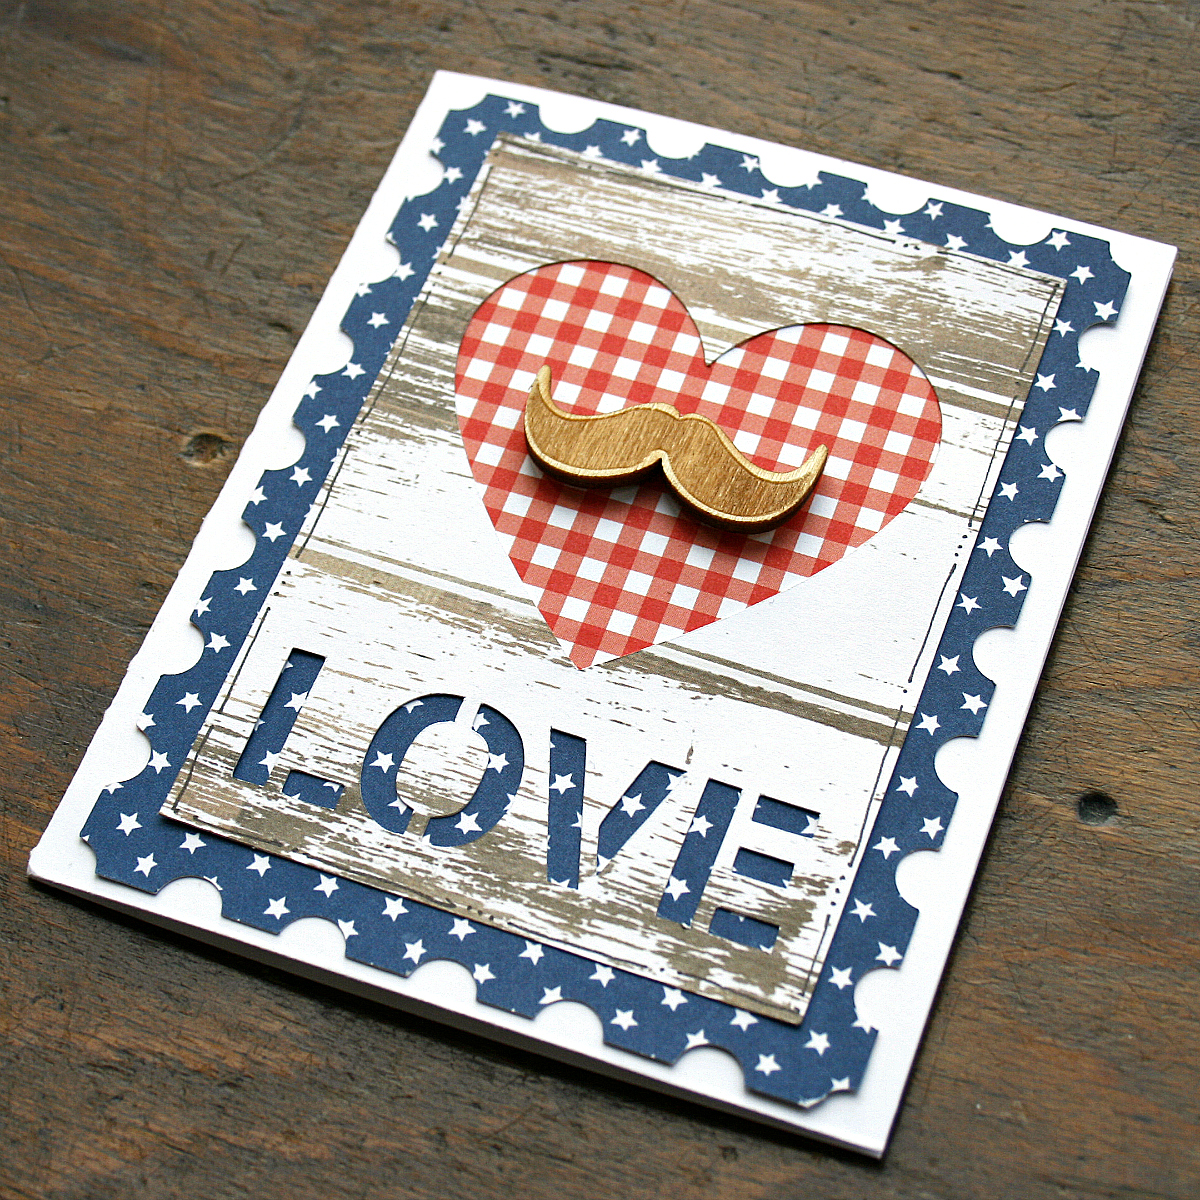
However, as I had so much fun playing with the 17turtles digital cut files (and all my scrappy stuff was still lying on my table) I decided to create this simple card using one of the new cut files "Love Stamps":


and this it what the "Love Stamps" digital cut file looks like:


I really love this file! Because of the size of my card I used only one of the stamps, but I think I know what I'll be using for my next layout!

Supplies: patterned paper: Pebbles Inc.; cardstock: Bazzill Basics, wood veneer: Bo Bunny.

Thank you so much for stopping by and I would love to learn what you think of my layout (and little cutting tip) on 17turtles blog!

xoxo