Sunday 28 November 2021

You're My Favorite || Pretty Little Studio

Hello friends! I thought I would share this Pretty Little Studio - Frosty and Friends layout featuring my Cocker Spaniel. Here's the layout I created:


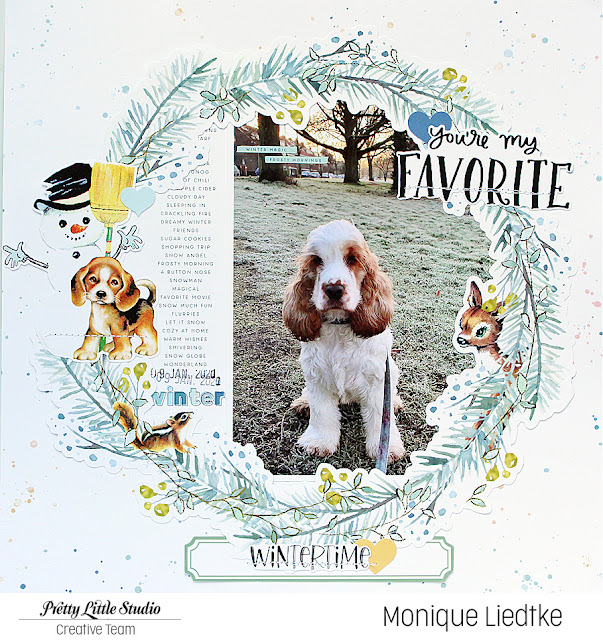
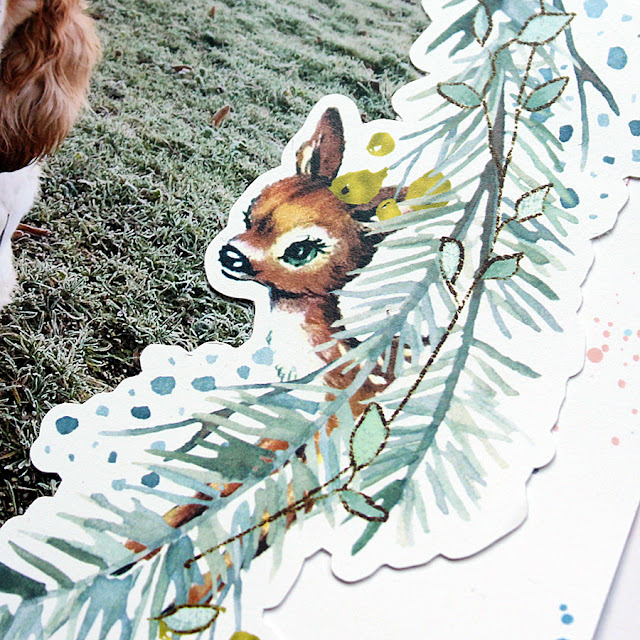
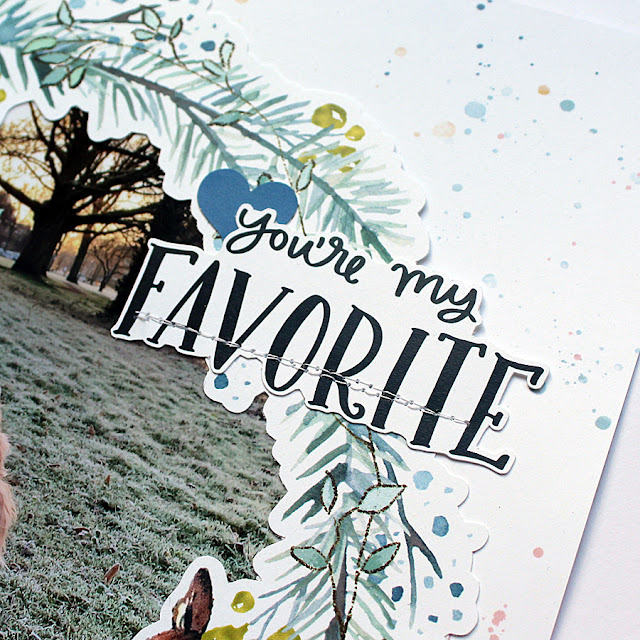
For this layout I used the patterned paper called White Out for my background. I placed the large Woodland Wreath 11" die-cut on top. This die-cut is so super cute! I think I need more of it! 


Look how cute:


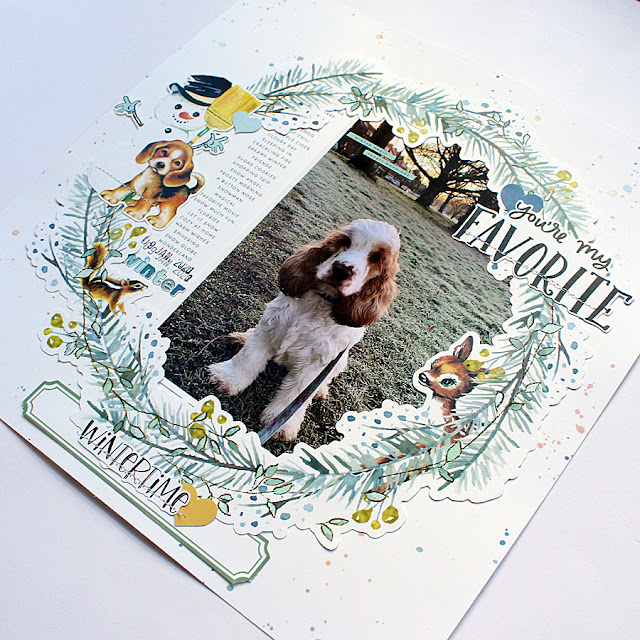
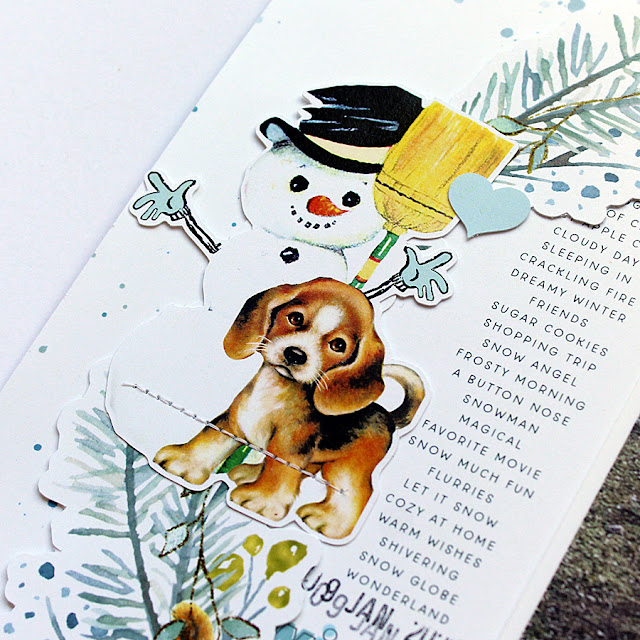
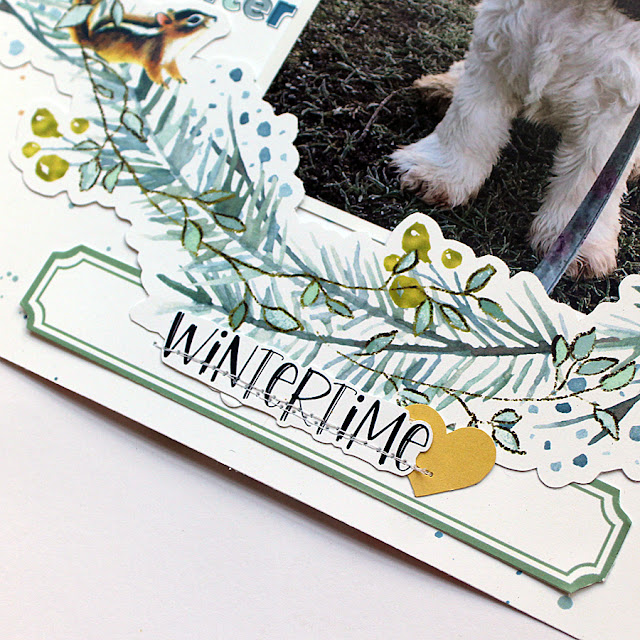
Behind the wreath I placed the photo of my puppy and on the left side of the photo I placed one of the large 3" x 8" journaling cards from the Favorite Things package. Also on the left side I added a die-cut of a snowman with a dog.


On the top right side of the wreath die-cut I placed this word die-cut from the Winter Wishes package.


And below the photo a word die-cut from the Snowflake Kisses package placed on top of a large (wintery) label:


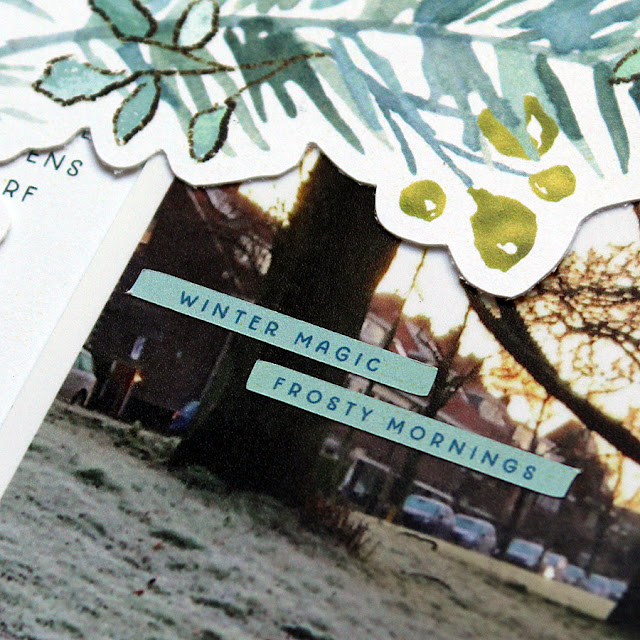
On the photo I adhered two light blue word stickers from the sticker sheet Marshmallow World Words.


This is it! Hope you like it! I love this Frosty collection so much, with its cute designs and beautiful colors. I hope I've been able to inspire you to give this collection a try. 

Here's a list of the Pretty Little Studio products I used:


Stickers | Marshmallow World Words (color)

Journaling | Favorite Things 3x8

Punch-Out | Wintery Labels

Thank you so much for stopping by! Don't forget to visit the Pretty Little Studio shop for this collection or one of the many other collections. 

Hugs!


Tuesday 16 November 2021

Deck the Halls || My Creative Scrapbook Step-By-Step

Hello friends!! Today I'm sharing a step-by-step instruction on how to create this Christmas tree I used on the layout I made for My Creative Scrapbook. This month I got the Creative kit which featured the joyful Holly Days collection from Simple Stories. 

This is the layout I created:

For the steps to create the tree I made a photo collage, but first let me show you a photo of the awesome November kit. Look how much it contains!!

Look how cute those die-cuts are:

And this is the tree for which I made the step-by-step instructions:

So, let me show you the 9 steps:


Start at the top left photo and then work your way from left to right. 

I cut 5 squares measuring 3.75" x 3.75", 4.5" x 4.5", 5" x 5", 5.75" x 5.75" and 6.5" x 6.5". 
  1. The first photo shows the fold lines with which you start. 
  2. Fold the square of paper horizontally (top/bottom and left/right).
  3. Fold also diagonally (left bottom corner to right top corner and right bottom corner to left top corner).
  4. Fold sides inward so you have a triangle shaped "pile" (two triangles on top of each other with the sides folded inward).
  5. Flatten the triangle shape.
  6. Fold the left and right side of the upper layer of the triangle inward.
  7. This is what it should look like.
  8. You are done! 
Create 5 of these tree parts in differtent sizes and with different patterned papers (so perfect that the papers in this collection are double sided!). 

Before adhering the parts on my page I colored a tree shaped triangle on my white background cardstock using a soft brush, two colors of Distress Oxide stamping ink and a stencil:


I added double sided tape at the bottom of the tree parts, so I could still slide the parts a little in each other:


In the end I decided to add a tiny staple at the top so the folded parts didn't fold open too much:


The last step was to adhere the individual parts on my page. I slid the top of each part in the bottom of the part above:


Here are a few more close-ups of my finished layout:


I love stitching on my pages!!


Loving this chipboard Santa! 


This is it! Hope you like it! 

Thank you so much for stopping by the blog today! I hope I've been able to inspire you a little! 

Here's a photo of the November Creative Kit I used: 

For more information about this kit (and the other 3 kits of this month) please visit the My Creative Scrapbook website and if you want to see the photos of all projects created by the design team with the various kits, please visit the Design Team Gallery.

Wishing you a wonderful day! 

xxx Monique

Tuesday 2 November 2021

I Heart Autumn | Pretty Little Studio

Hello friends! Today I'm sharing a layout I created for Pretty Little Studio using the "Grateful Heart" collection and featuring a strip of three small Autumn photos. Here's the layout I made:


For the background I stenciled on a sheet of white cardstock with a stencil from Vicki Boutin and Distress Oxide (Dried Marigold). On the left side I stitched a strip of torn paper from the sheet called "Gratitude" (mustard). 

I adhered the photo strip on two 3" x 4" journaling cards (called "Grateful Heart") and I placed another journaling card on the right side of the photos, stitching throught this one with some orange colored thread. 


Next I added a little stripy tag and wound a length of twine through the hole at the top. After placing some fun die-cuts here and there on my page I was almost done.
 

On the right side of my page I wrote a few lines of journaling and machine stitched beneath:


Last but not least I added a few drops of silver colored ink. 
I really really love this collection! 


Thank you so much for stopping by! Don't forget to visit the Pretty Little Studio shop for this collection or one of the many other collections. 

Here's a list of the PLS products I used:


Journaling | Grateful 3 x 4


You can find more of my work here: Instagram / Blog / Pinterest