Thursday 28 April 2022

Moments || Step-By-Step for My Creative Scrapbook

Hello scrapbook friends! Yet again I've got a step-by-step tutorial for you which I made for one the layouts I created with the awesome April Creative Kit from My Creative Scrapbook. This kit is filled with both Spring and Easter related papers and embellishments from Echo Park! So fun!! 

This is the layout for which I wrote my step-by-step instructions, a layout of my youngest when he was still little: 


As usual I started with displaying the contents of the kit on my work surface. All the sheets are double sided and the kit containes two of each sheet! So no hard time choosing which side to use this time. There were also so many embellishments for both for Spring and Easter layouts! LOVE!


For the background of my layout I used a sheet of watercolor paper and applied a layer of light green watercolor paint: 


Using a dotted stencil I applied white gesso on top, using one of the hotel cards I never throw away:


Next I sprinkled dark green color mist drops on top:


With my Silhouette Cameo I cut out the "Moments" cut file, which is free for subscribers of the kits. Beneath the cut file I placed three strips of Easter paper:


I matted the photo and placed it on the left of my layout right above the cut file with an Easter bunny on the right side of it. The bunny was hand cut from one of the tags:


With my sewing machine I stitched both around the layout (twice) and over the three strips of paper:


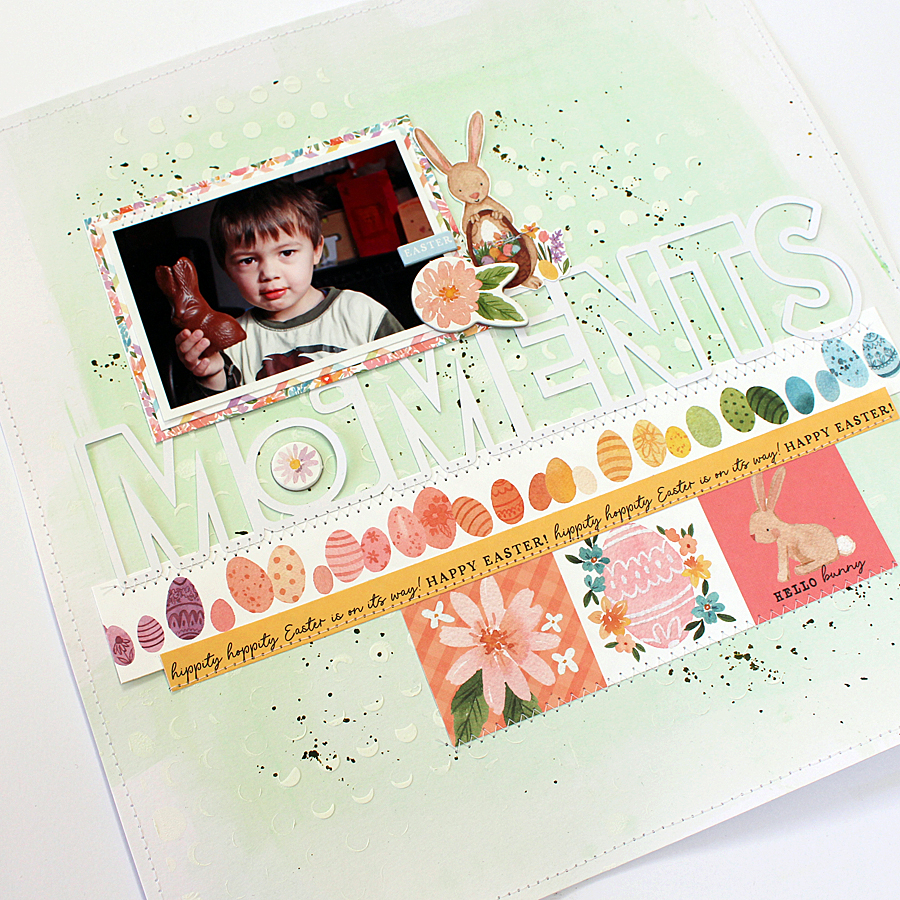
Last but not least I stamped the date and wrote a line of journaling. I also added a few more stickers and I was done! Hope you like it!

Here's a photo of the April Creative Kit I used: 


For more information about this kit (and the other 3 kits of this month) please visit the My Creative Scrapbook website and if you want to see the photos of all projects created by the design team with the various kits, please visit the Design Team Gallery.

Wishing you all a wonderful day! 

xxx Monique

Monday 11 April 2022

All You Need Is Love || Pretty Little Studio

Hello friends! Today I'm sharing a Color Me Happy layout which I created for Pretty Little Studio. Color Me Happy is one of my favorite Pretty Little Studio collections with it's bright and happy colors and cute embellishments. For today's layout I chose a photo of me with our puppy. Here's what I made:


Here are a few detail photos: I love all the rainbow die-cuts in this collection. Here's one with a cute little duck.


Of course I machine stitched on my page, both along the sides of the layout as well as over the stickers and die-cuts.


Isn't this fox die-cut super cute?!


I wrote my journaling on stitched lines. Love the extra dimension stitching gives a layout.


This is it! Thank you so much for stopping by our blog and please don't forget to check out this colorful collection in the PLS store! 


Here's a list of PLS products I used: 

Saturday 9 April 2022

You Are The Sweetest || Step-by-step tutorial for My Creative Scrapbook

Hello friends! I'm here today with another step-by-step tutorial I wrote for one the layouts I created for the kit club My Creative Scrapbook with the awesome March Creative Kit. I adore the Kid at Heart collection from Pebbles Inc. that is included in this kit. A few years ago I was on the DT of Pebbles Inc, so this kit was right up my alley! 

This is the layout for which I wrote my step-by-step instructions: 


As usual I started with displaying the contents of the kit on my work surface. All the sheets are double sided and I had a hard choosing which side to use. And this kit contains so many embellishments!!


For the background of my layout I chose the "Scatter Happiness" paper and applied a layer of white gesso on top, using one of the hotel cards I never throw away:


In my stash I keep an old book from which I use the pages for my layouts (I had a few copies of this book so I had no difficulty tearing this one up).


I tore out approx. six sheets and using a heart punch I punched rows of hearts from the six sheets in one go: 


Using the negatives of my punching exercise and my sewing machine I stitched the strips of book paper on my layout:


I cut one of this month's free cut files (called Flower Cluster) twice from one of the patterned papers, called "Get Your Happy On" and placed one on the right side of my page and one on the left side: 


I matted the photo of my son sitting on a sleigh in the snow looking up at me and placed this on cut out flowers on my layout:


Now I had the difficult task to find the right embellishments in this enormous pile of super cute die-cuts (I wanted to use them all!):


When I had finished adding my embellishments I wrote a few lines of journaling and I was done!


I really love the result! Hope you do too! Thank you so much for stopping by the blog today! I hope I've been able to inspire you to give this kit a try (don't forget to share if you do!)! 

Here's a photo of the March Creative Kit I used: 


For more information about this kit (and the other 3 kits of this month) please visit the My Creative Scrapbook website and if you want to see the photos of all projects created by the design team with the various kits, please visit the Design Team Gallery.

Wishing you all a wonderful day! 

xxx Monique