Saturday, 24 October 2020

Trick Or Treat | Pretty Little Studio

 Hello friends! Happy Saturday! Today I'm sharing my latest Halloween layout on Pretty Little Studio's blog. In a shoebox I found this darling photo of my youngest (who is now taller than I am!). I knew straight away what I would make for today’s project! Pretty Little Studio has so many cute Halloween products in the store which are all just perfect for this photo!


I started with two sheets of cardstock: one tangerine and one black. From the black one I cut off 1.5 cm on two sides and distressed the edges a little. I adhered the black sheet on top of the tangerine one and machine stitched them together. Next I matted the photo on a piece of vellum and on a piece of patterned paper and placed them in the middle of my cardstock background. Behind the photo I added a 2″ x 8″ strip of distressed patterned (pumpkin) paper.


Now came the fun part: adding all the little bits and pieces! First of all the 4″ x 6″ journaling card on the left:


And this adorable vintage die-cut of a witch’s hat with a broom in it’s hand and one of the 2″ spooky circle tags:


I found this Halloween flair in my older Pretty Little Studio stash:


And also this cute die-cut:


Using my Silhouette Cameo I cut out the word “smile” and three little pumpkins and added these to my page as well:


With a white sharpie I wrote a tiny bit of journaling and with the addition of some white paint drops my pages was done. I’m really happy with how this turned out.

Here’s a list of the PLS product I used:


Vintage Die-Cuts | Halloween pack


Circle Tags | Halloween 2″

Thank you so much for taking a peek at my page! Don’t forget to visit the Pretty Little Studio store to check out all the fun Halloween related products! Wishing you a wonderful weekend!


Monday, 5 October 2020

My Creative Scrapbook September Main Kit - Step By Step

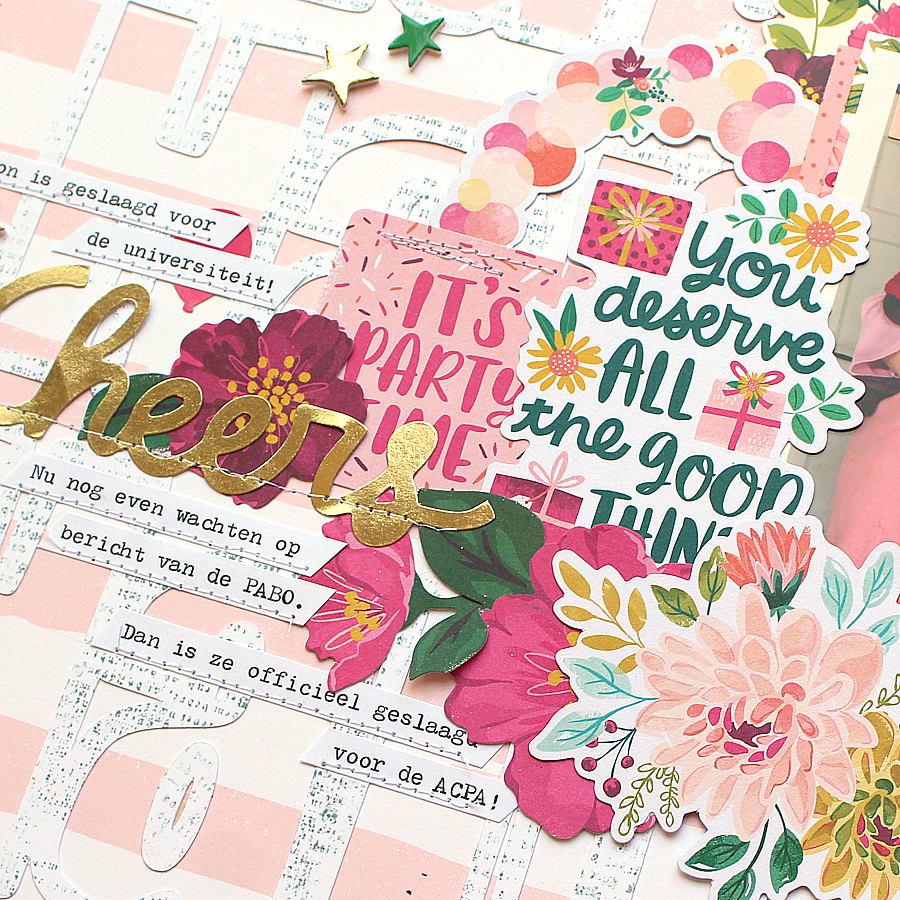
Today I'm sharing a step-by-step for a layout I created with the September Main Kit from My Creative Scrapbook featuring the "And Many More" collection from Pink Paislee and one of the free subscriber cut files. My daughter had just heard that she had passed all her tests and exams from University! Time to celebrate and be happy!


I started with choosing the patterned papers I wanted to use and by cutting the word "Happy" three times from a sheet of white cardstock using my Silhouette Cameo:

As I found the white letters too white, I decided to stamp some text on them using a Prima Marketing stamp from an older kit and light grey ink:


I placed the three words on the pink/white striped paper:


When I had matted my photo I placed this on the right side of my background paper and arranged a few bits and pieces around it:


And some more bits and pieces:


And even more:


Using my We R Memory Keepers type writer I typed some lines of journaling:


I cut the journaling apart and placed them on my layout:


For the finishing touch I added some machine stitching:


And I was done! Hope you like my page! Here are a few more close-ups of the layout:


I really LOVED this kit! I love the colors and the designs, but above all that it was a birthday kit! I have so many birthday photos I still need to scrap, so this kit was pretty much perfect! 

For more information about this kit (and the other 3 kits of this month) please visit the My Creative Scrapbook website and if you want to see the photos of all projects created by the design team with the various kits, please visit the Design Team Gallery.

Thank you so much for stopping by to take a look at my page! Wishing you a wonderful week!

xxx

Monique

Sunday, 4 October 2020

World Card Making Day 2020 - Doodlebug Winter Wonderland Card

Yesterday it was World Card Making Day 2020 and I loved seeing all the fabulous cards everyone created. I felt so inspired (especially after I saw Doodlebug's sketch on their blog!) I decided to join in the fun and create one of my own. 

I'm a huge Doodlebug Design fan so I looked through my Doodlebug stash and decided to use the awesome Winter Wonderland collection for my card. Here's what I made:


and this is the sketch I used:


A few more photos:


Here's a list of what I used: 

Doodlebug Winter Wonderland collection: 6x6 paper pad, petite prints, heart shape sprinkles (winter hugs), chit chat, odds & ends, this & that cardstock stickers.

Thanks for stopping by to take a peek at my card! 
xoxo
Monique

Sunday, 27 September 2020

My Creative Scapbook September Projects!

How time flies! I just noticed my last blog post is from August 12th! How is that possible?! I did scrap a few pages in the last month, so without further ado here are 3 layouts I created with the September Main Kit from My Creative Scrapbook! This kit featured the "Any Many More" collection from Pink Paislee. Perfect to scrap all those birthday photos lying around the house (even of the dog!).

My daughter's 23 birthday:


And the close-ups:


A layout of my son's 21st birthday:


And the close-ups photos:


And now a layout of our dog's 1st birthday:


And the close-ups:


When I look at these layout I realize they are all multi photo layouts! I'm quite proud of myself! 

For more information about this kit (and the other 3 kits of this month) please visit the My Creative Scrapbook website and if you want to see the photos of all projects created by the design team with the various kits, please visit the Design Team Gallery.

Here's a photo of the September Main kit:


Thank you so much for stopping by! Wishing you a happy day!

xxx Monique

Wednesday, 12 August 2020

Beautiful | My Creative Scrapbook August Step-By-Step | Pink Paislee 5th & Monaco

Today I've got another step-by-step of one of my My Creative Scrapbook layouts. This time I used the August Main Kit to create my page. I'm a huge fan of everything Pink Paislee and was so happy to see the 5th and Monaco collection in this month's kit!


For today's step-by-step I selected this beautiful flowered paper called "paper 8" to create this layout of my daughter and our sweet Spaniel.


As soon as I saw the number 8 paper I knew I wanted to fussy cut it, but as I love color I couldn't just leave it b/w! It had to be painted first! I went with the colors of the photo: pink, light blue and a bit of orange/yellow. I grabbed my little distress ink pads and dabbed some of the ink on my glass plate and added water. 


With a large soft square brush I painted the paper 8 with the water color in large slow strokes. I tried not to add too much water as I didn't want to damage the paper. Afterwards I dried the paper with a heat gun.


Now came the fun part: the fussy cutting. I cut the flowers I wanted to use and (hand) cut them out.


Meanwhile I also prepared the background for my layout. I sprayed pink ink on a white cardstock and added drops of pink and blue ink. 


Using the Maggie Holmes template that's included in the kit and my little distress inks and a soft brush I added a few extra bits to my background:


Next I placed my (matted) photo and all the cut out flowers diagonally on the background cardstock and adhered them. I tried to do this in a way that some of the leaves were still curling a little: 


Using lots of the stickers and die-cuts from the kit and a date stamp I finished my page. Here are a few close-up shots:


Isn't this another awesome kit?! I'm so in love with the designs in this collection! For more information about this kit (and the other 3 kits of this month) please visit the My Creative Scrapbook website and if you want to see the photos of all projects created by the design team with the various kits, please visit the Design Team Gallery.

Here's one last photo of the kit:


Thank you so much for stopping by! Wishing you a happy day!

xxx Monique